


37 How-To
This reference section gives simple instructions on technical procedures.
37.1 Disable Sleep mode
When a computer is not being used for a while, some systems are configured to go into “Sleep mode", “Standby mode", “Hibernation", or some other power saving state. While this is good for conserving energy, it can be bad for External A/V testing. Because the T.O.V.A. test does not use the computer or mouse, some systems can fall asleep during a test, which will essentially ruin the results of the test.
The T.O.V.A. tries to counteract this, but it does not work on all computers.
To be on the safe side, we recommend that you disable Sleep Mode on any T.O.V.A. system where you intend to do External A/V testing.
If that’s not possible, the computer’s sleep mode should wait at least an hour.
Note: How to disable Sleep Mode on different systems will vary somewhat. If the instructions below don’t work for you, contact your system’s manufacturer.
-
Click the Start button and type ‘Power’.
- From the results, choose ‘Power options’ or ‘Power and sleep settings’.
- Navigate to sleep settings and, for when to go to sleep, choose ‘Never’. Note: You may have to disable this in multiple places (‘Plugged in’, ‘On battery’, etc.).
- If necessary, save your changes.
37.2 Find your data
Having trouble finding your T.O.V.A. data? There are a few possible explanations for this:
-
Did you install the T.O.V.A. on a new computer?
The T.O.V.A. stores your subjects and sessions in a local database on your computer’s hard drive, not on the T.O.V.A. USB device or in the cloud.
See ‘Migrate the T.O.V.A. to a New Computer’ (section 37.4) for help in moving your T.O.V.A. data.
- If you don’t see all of your subjects or sessions, your view might still be restricted by the ‘Search’ field. Clear any text in the field and press ‘Enter’ to view all of your subjects and sessions. Remember that you can sort on any column by clicking the column, and sort the other direction by clicking it a second time.
Note: Even if there was nothing in the search field to begin with, there can be occasional display glitches. Pressing ‘Enter’ will refresh the contents of the main window and fix most of these problems. If you find any repeatable problems (“Every time I do this, the display does that.”), please let us know. We want to fix any such problems.
- There’s an option in the Preferences to not ‘Display subjects and sessions on startup and blank search’ (section 27.11,
intended to protect PHI from subjects that might appear when you start up the T.O.V.A. .
- There are two database configurations: Shared and Separate. You can find your current selection in the Advanced Preferences (section 27.4). If you select a ‘Separate’ database, each login on your system will have its own database, and you will not see each other’s subjects and sessions. If you use a different login than usual, then, you won’t see your usual subject data.
- Do you have your database stored on a network shared drive?
The T.O.V.A. only supports storing your database locally, not on a network.
See section 27.4 for more information.
37.3 Manually update the T.O.V.A.
With the T.O.V.A. ’s Automatic Update, we’ve tried to make keeping your T.O.V.A. up to date with the latest features and fixes easier than ever.
However, sometimes automatic update will fail (Did you really close all your programs before updating?), and in this case you may want to update your T.O.V.A. manually.
A manual update works just as well as the automatic one, with one caveat: You must have access to Administrator permissions. Here’s how you do it:
-
Find the latest update. Go to https://www.tovatest.com/downloads/ and enter your T.O.V.A. USB device ’s serial number. This will give you the installer (a ‘.pkg’ or ‘.exe’ file), and you should download it to somewhere you can find it.
Note: The installer is a large file (about 300 MB at the moment).
If you have problems downloading it, you might need to find a system with a better internet connection.
Download the installer from a more reliable connection, copy it to a flash drive, and bring it to your T.O.V.A. computer.
If you do not have the flash drive included in your T.O.V.A. kit, you can order one from The TOVA Company.
- Exit the T.O.V.A. and any other applications that are running (You should do this before installing any application, really).
- Run the installer. Just like the first time you installed the T.O.V.A. , it may confirm/request Admin permissions, ask you to accept the license, etc.
- Once finished, you may run the T.O.V.A. .
That’s it! The good thing about a manual update is that it may make apparent what error was causing the update to fail before, and perhaps even let you correct it.
37.4 Migrate the T.O.V.A. to a new computer
Transferring the T.O.V.A. from one computer to another is not really a problem.
The T.O.V.A. software can be installed on multiple computers, even if you only have one T.O.V.A. device, and there are no copy restrictions.
T.O.V.A. technical support can answer questions about your specific computers, but here are some general steps:
-
First, review our T.O.V.A. system requirements (section 11.9), to make sure the T.O.V.A. will work as you expect on the new computer.
- Next, download the latest version of the T.O.V.A. software by entering your serial number here: https://www.tovatest.com/downloads/.
- Install the T.O.V.A. software on the new computer, making sure to configure the hardware setup (EAV or PTE) as appropriate to this computer.
See ‘Installing the T.O.V.A. ’ (section 11.12) for more information.
- The last part of the install is connecting the T.O.V.A. hardware (section 15).
Make sure to set up the hardware as shown in the installation guide.
Your T.O.V.A. test credits are stored on the T.O.V.A. USB device (the black box), so they will come with it to the new computer.
- Your T.O.V.A. subjects and sessions are stored in a database on the old computer.
To move it, you will need to back up that data from the old computer and then import it on the new computer.
-
On the old computer, run the T.O.V.A. application and click ‘Help’ > ‘Back up database...’.
Follow the steps to save all your subjects and sessions to a .tova file.
- Copy that file to the new computer.
You can copy the backup file to a thumb drive, a shared path on the network, or even a cloud-synced folder.
- On the new computer, double-click the .tova file to import the data into the new database.
For more specifics or if you run into trouble along the way, please send us a tech support request (section 29) on the old computer and on the new one, or just give us a call.
37.5 Modify Admin Preferences
There are certain T.O.V.A. preferences that require administrative privileges to access.
If you are unable to access Admin preferences in the T.O.V.A. , you should run T.O.V.A. Admin Settings with administrative privileges.
Note: Some preferences that can be modified in the T.O.V.A. application are not accessible in T.O.V.A. Admin settings.
The easiest way is from ‘Change Admin settings’ button in the T.O.V.A. ’s Preferences window.
-
From the Preferences window, click ‘Change Admin settings’. The Preferences window will close.
- When prompted, enter your username/password or agree to allow this program to make changes on your computer (Figure 80).
- T.O.V.A. Admin Settings will open, allowing you to modify the Admin settings. When you’ve finished, click ‘Save’ to restart the T.O.V.A. application with the new settings.
You can also use the separate T.O.V.A. Admin Settings application:
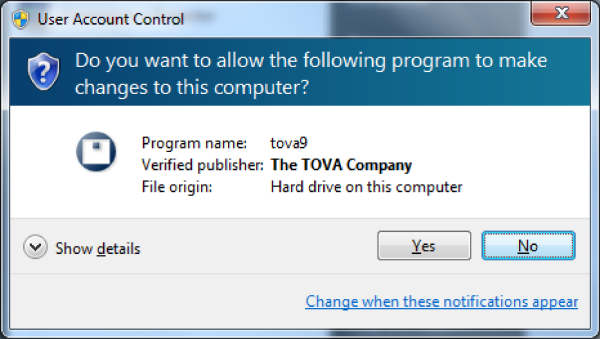
UAC message on Windows 7
-
Quit the T.O.V.A. application.
- Find ‘T.O.V.A. Admin Settings’ in your Start menu (Windows) or Finder (macOS). On macOS 10.15 or later, use TOVA_Admin_Settings.command and blind-type your password when prompted.
- When prompted, enter your username/password or agree to allow this program to make changes on your computer (Figure 80).
- T.O.V.A. Admin Settings will open, allowing you to modify Admin preferences.
- When you’ve finished, click ‘Save’ and run the T.O.V.A. normally.
37.6 Move the T.O.V.A. database
Moving your database is pretty easy in the T.O.V.A. .
First, ALWAYS back up your T.O.V.A. database (section 23) before attempting any procedure like this.
Then simply change your database path, and the T.O.V.A. will offer to move the database for you. Here’s how it works:
-
If you browse to select a database path,
\data
will be added at the end. That folder (and the files and folders inside it) is your database. If you type your path into the ‘Path’ field, the folder is not added; your database path will be as you typed it.
- When you choose a new database path and then click ‘Save’, the T.O.V.A. will check if there is a database there already. If there is, it will connect to the new database and shut down the old one.
- If there is no database at the new path you’ve chosen, when you click ‘Save’ you’ll be given the option to move the previous selected database to the new location.
Make sure that the old path and the new path are correct, so that the correct database is moved to the correct location.
The database will be copied to the new location and the database at the old location will be deleted.
Therefore, this should NOT be used as any kind of backup technique.
- If there is no database at the new path, and you choose not to move the database, a new database will be created at the new location, containing one example subject.
- If the path does not contain a database, make sure that it is fully accessible and either empty (containing no files or subfolders) or non-existent (the path will be created when it creates the database).
- The T.O.V.A. does not support network share databases or simultaneous access by multiple users!
Storing data on a server or network share will most likely result in lost data!
You should store your data locally on the hard drive, and while multiple user logins on the same computer may use the T.O.V.A. ,
each must close the application before the next may open it.
Note: To move your database to a different computer, simply back up your database (section 23), copy the backup file to the new computer, and import it (section 24).
You can still always move your database as you previously could in the T.O.V.A. . This includes these main steps:
-
Exit the T.O.V.A. application.
- Discover the current location of your database.
- Move the folder to the new location
- Point the T.O.V.A. to the new location of the database.
If you’re not comfortable with these steps, contact T.O.V.A. technical support for assistance. We are happy to help.
37.6.1 Notes on choosing a database path
There are a few things to remember when choosing a different database location:
-
The T.O.V.A. does not support network share databases.
The T.O.V.A. database must be in a folder on your computer’s hard drive (usually C: or D:), not on another computer yours is connected to.
Storing data on a server or network share will most likely result in lost data.
Similarly, we do not recommend storing your database on a flash drive or other portable drive.
- If you are using a ‘Separate’ database (section 27.4), there will be a separate database for each user on the system. If moving to a different computer, each of these user’s databases (if any) may need to be moved.
- If your computer is shared by multiple users, make sure that all of the users can access the new path to the database.
37.7 Reassign a session to a different subject
Sometimes you may find that a test was administered to the wrong subject. The T.O.V.A. provides a couple of ways to fix this problem. First, a few important notes:
-
If the session should have been assigned to a subject that does not yet exist in the T.O.V.A. database, create the subject first, then reassign the session to that subject.
- Note: It’s important to avoid this mistake. Children below the age of five-and-a-half are not administered the same test format as older subjects. If you administer the wrong test format to your subject, the T.O.V.A. will not be able to properly interpret it.
- Note: Please do not try to reassign the test by editing the subject! If the test is assigned to Joe and it should have been assigned to Mary, editing the subject information will only leave you with two identical ‘Marys’.
You can reassign a test session by first editing the session and then choosing ‘Assign to a different subject’.
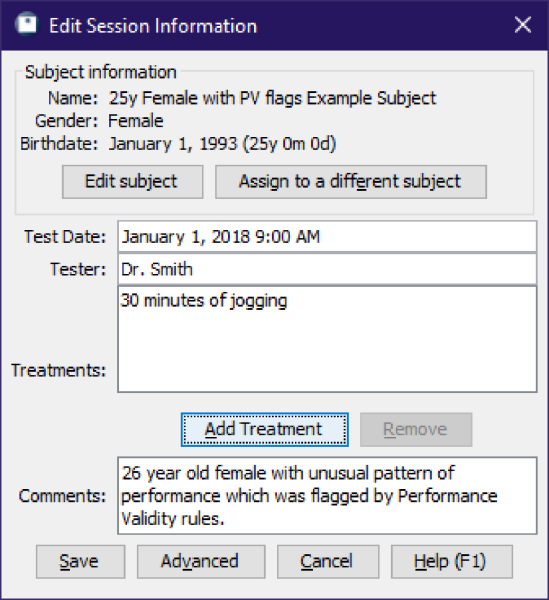
Edit the session to reassign it
-
Highlight the session in the Subjects or Sessions tabs of the main T.O.V.A. window.
- Click ‘Edit’ to bring up the ‘Edit Session Information’ window.
- Click ‘Assign to a different subject’ to bring up the ‘Reassign Session’ window.
- Select the subject the session should have been assigned to and click ‘Select subject’.
- When prompted, confirm that you want to reassign the session.
You can also reassign a session with drag-and-drop. Double-clicking a subject will expand it to show all the tests administered to that subject. You can then click on the test that’s misassigned and drag it to the correct subject.