


The Hardware Setup wizard starts automatically after you finish the Configuration wizard (section 14), and it helps you to test your T.O.V.A. hardware connections to make sure you’re set up correctly. The T.O.V.A. hardware must pass each test to go on to the next page. If you haven’t set up your hardware yet, please see section 15 first.
Note: Which pages you see will depend on which hardware setup you selected in the Configuration wizard.
When you see the first page of the Hardware Setup, it’s time to attach your T.O.V.A. hardware. Follow the “Installation Guide” included with your T.O.V.A. kit. When you have finished installing your hardware, click ‘Next’ to begin testing your hardware and connections. If you have questions about installing your hardware, see section 15.
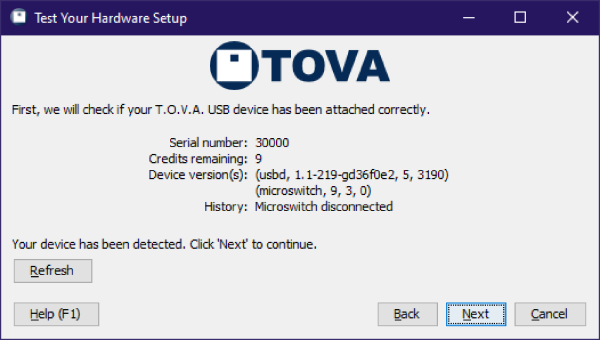
The first test of the Hardware setup wizard tries to detect your T.O.V.A. USB device . If it reports “No T.O.V.A. devices found”, you may not have attached the device correctly. See section 31.1.3 to help you troubleshoot this problem, and click ‘Refresh’ to try detecting the device again.
When your T.O.V.A. USB device has been detected, click ‘Next’ to continue.
Once your device has been detected, we next ask you to test that your microswitch is correctly attached and working. Choose ‘Check microswitch’ and press the microswitch button ten times. Be sure to press the button exactly ten times: If the microswitch test persistently reports more or fewer presses than you give it, you should contact The TOVA Company to replace your microswitch immediately.
When your microswitch test passes, click ‘Next’ to continue.
Note: If you chose the EAV hardware setup, you should skip to the next section (section 16.5).
This is the last step of the PTE Hardware Setup wizard. By now you have your T.O.V.A. USB device and microswitch attached correctly. Next, you should test the PTE, where you will be administering tests to your subjects.
Once you’ve tested the PTE, you have finished verifying your PTE Hardware Setup. Congratulations! You’ve finished installing the T.O.V.A. ! We strongly recommend that you go ahead and read through ‘Using the T.O.V.A. ’ (section 19).
Note: If you chose the PTE Hardware setup, you will not see this page of the wizard nor those following.
There are a few more attachments to verify for the EAV Hardware setup. Click ‘Check EAV Video’ and—if your video attachments to your computer, T.O.V.A. USB device , and monitor are correct—the device will send a T.O.V.A. image to your screen for a few seconds.
If you do not see the images (the T.O.V.A. logo, visual test stimuli), make sure that ’video out’ is connected to your display and ’video in’ is connected to your computer’s VGA port: It’s easy to reverse them.
When your video test passes, click ‘Next’ to continue.
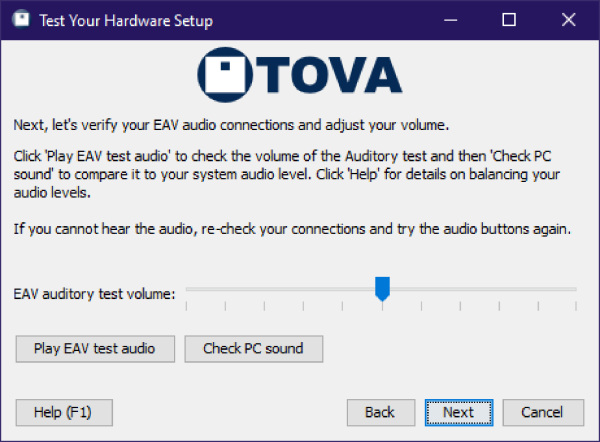
Next, we want to verify that your audio cables are attached correctly to your computer, your T.O.V.A. USB device , and your speakers, and that the volume is appropriate to your system.
Choose ‘Play EAV test audio’ to play a series of sounds to verify the connection between your T.O.V.A. USB device and speakers. Choose ‘Check PC sound’ to test your system volume and the entire audio connection. For more information on adjusting and troubleshooting audio problems, see section 31.7.
When you have verified that your audio is working and the volume is properly adjusted, click ‘Next’ to continue.
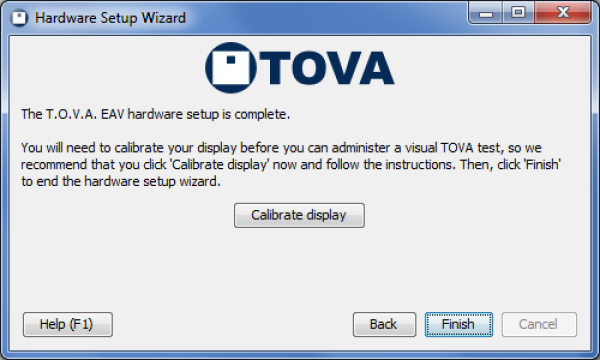
Once you’ve reached this page, you have verified that your hardware is installed correctly for EAV testing. Before you finish, though, click ’Calibrate display’. Successful display calibration is required before you can administer a Visual T.O.V.A. test. See section 20.5.1 for more information.
Congratulations! You’ve finished installing the T.O.V.A. ! We strongly recommend that you go ahead and read the quick and helpful ’Using the T.O.V.A. ’ guide, section 19.
 Your T.O.V.A. USB device is correctly attached
 Now that your hardware is tested, test the PTE
 Now that your hardware is tested, test the PTE