


The Preferences window is where all the T.O.V.A. settings are managed. Choose the category you are looking for on the left and the settings for that category will be displayed. Choose ‘Save’ when you’ve finished making your changes.
Some T.O.V.A. settings require Admin privileges to change. Even if your login is an Administrator on the system, the T.O.V.A. application may run without Admin privileges (this is the default behavior in Windows).
These restricted preferences can only be modified from ‘T.O.V.A. Admin Settings’ (section 37.5).
Note: Some preferences that can be modified in the T.O.V.A. application are not accessible in T.O.V.A. Admin settings.
All T.O.V.A. System preferences (as opposed to Admin preferences) should be fully accessible to all T.O.V.A. users. If the T.O.V.A. is unable to write to files in the shared TOVA folder, you may be prompted to let the T.O.V.A. application fix the problem.
If you encounter this error (Figure 41) and you have Administrator access to your Windows PC, click ‘OK’ and grant the T.O.V.A. access to make changes to your computer.
Mac users: This built-in function is currently only available for Windows. If the T.O.V.A. reports “Your system preferences couldn’t be saved.”, there’s a script on your T.O.V.A. flash drive that can correct the problem:
Please contact T.O.V.A. technical support if you continue to have permissions issues (section 29).
The T.O.V.A. allows you to add your own fields to the T.O.V.A. database and display the information on reports and the main window. This can be of particular use to researchers.
In the Preferences window, you can ‘Add’ new custom fields, select and ‘Edit’ them, or ‘Remove’ fields you no longer want. Custom fields can be flagged as containing Protected Health Information, in which case they will be removed or hidden along with Subject Name when appropriate (see section 26 for more information on PHI).
There are two kinds of custom fields: subject and session. Subject fields follow the subject through all of their sessions, whereas session fields apply to a specific T.O.V.A. test session. Let’s say you’re doing a study of how “Hair length" affects attention and impulsivity. While length of hair applies to a subject, it could easily vary between sessions. The first time you test Tina Anderson, she may have long, flowing hair, but by the time you test her again, she may have cut it short. Therefore, you should add “Hair length" as a session field, not a subject field. Conversely, “Eye color" should be a subject field as it is unlikely to change over the course of one’s life.
By default, custom fields will not appear on the main window or report. To add them to the main window, see Subject/Session Table fields, section 27.8. To add them to the report, see Customizing the Report, section 21.1.
Note: Some of these settings are Admin preferences (section 27.1).
The T.O.V.A. stores all of your T.O.V.A. test sessions in a database. There are two database configurations you can choose from:
See section 37.6 for more information on changing your database path.
Note: These are mostly Admin preferences (see section 27.1).
We have always encouraged users to back up their T.O.V.A. database themselves (and continue to do so), but now you have new backup options:
This feature requires an internet connection, of course. Because this data may contain Protected Health Information (PHI), all data is encrypted and transmitted using the latest security protocols. To recover backups uploaded to the T.O.V.A. server, just send us a Technical support request (section 29).
You can also click ‘Back up database to the TOVA server now’, and a full backup of your entire database will be uploaded to The TOVA Company server.
A field is designated as a ‘legacy field’ if it is no longer being added or edited for new or existing subjects or sessions, but it is kept around for historical purposes. For instance, ‘Height’ and ‘Weight’ were fields in the T.O.V.A. 7, but are not used in the T.O.V.A. . When you import T.O.V.A. 7 files, any height and weight data will be imported as well, but you cannot edit these fields.
If you decide you want to be able to add or edit Height or Weight in the T.O.V.A. , you should de-select these as Legacy fields. Conversely, if your colleague shares a T.O.V.A. file with you that contains a ‘Hair length’ field, you may wish to designate that a legacy field, so that it will not appear as a field the next time you start a new session.
Logging is a very useful tech support tool for the T.O.V.A. . By default, the log will record in a file all error messages you may encounter in the T.O.V.A. . By adjusting the settings, you can record more or less information, or none at all, if you choose.
You can specify what information should be logged (by importance/severity), where your T.O.V.A. log file will be stored, and how logging will be performed. Generally, T.O.V.A. users will not want or need to modify these settings from their defaults unless asked to do so by T.O.V.A. technical support.
The T.O.V.A. log, as well as other relevant system information, can be sent to T.O.V.A. technical support through our support request feature (section 29). The TOVA Company will not collect any information from your system without your consent.
With the Subject and Session Table preferences you can select which fields will or will not appear on the main window Subject and Session tables. The Subject table can display any or all of the default Subject fields, as well as any custom Subject fields. The Session table, likewise, can contain all of the default and custom Session fields, as well as all the Subject fields. Select the fields you want to see when browsing subjects and sessions and keep unnecessary information from cluttering your interface.
Note: Even if a private field is added, it will not appear if PHI is hidden (see section 27.11).
Note: Some of these settings are Admin preferences. You may need to run ‘T.O.V.A. Admin Settings’ (see section 27.1) to modify them.
This is our grab bag of system preferences that didn’t belong elsewhere. You would do best to ignore this section until and unless you actually need it.
Note: By default, ‘Subject number’ is considered a “legacy field”. It will not be available for editing until you deselect it under Legacy fields (section 27.6).
Note: This is an Admin preference (see section 27.1).
If there are users on your system whom you don’t want accessing the T.O.V.A. , here you can set a password for the app. This is a system-wide password and, of course, may only be set or removed by an administrator.
Note: This password only controls access to the T.O.V.A. application. Securing your T.O.V.A. data is a function of your operation system, through user-access levels and file/directory permissions, and while the T.O.V.A. accommodates this, the T.O.V.A. software does not itself encrypt or restrict your data.
Note: Some of these settings are Admin preferences (section 27.1).
If you are using the main window (where you browse subject information) in view of your subjects, you may want to hide Protected Health Information from view. Choosing ‘Hide Protected Health Information’ will leave Subject Name and other protected fields off of the main window, the session screen, and all reports, and never write it to the T.O.V.A. USB device .
You also have an option here to not ‘Display subjects and sessions on startup and blank search’. Deselecting this option means that until you enter search criteria, the main window will display no subjects or sessions, instead of every subject and session, which is the default behavior. In addition to not revealing PHI, this makes starting up the T.O.V.A. faster, especially if you have a lot of subjects in your database.
Finally, this panel notes whether you’ve accepted the T.O.V.A. Business Associate Agreement (BAA) and provides an option to review and accept or decline it. Note: Accepting or declining the Business Associate Agreement requires you to have Administrator access to your computer.
See section 26 for more information on protecting personal health information.
The settings here simply mirror those available in the Customize Report window (section 21.1).
Your session launch options determine which session type will be launched and how. You can modify these session launch options in the Preferences window (section 27) or for a single session by clicking ‘Options’ in the ‘New Test Session’ window (see section 20.4.1);
You will always launch a T.O.V.A. session the same way, by creating a new session and clicking the ‘Launch’ button. The first option here is to choose what type of session you will launch.
If this is an EAV test session, launching a session will immediately bring up the EAV session screen. Launching a PTE session, on the other hand, requires rebooting your computer.
If you choose to test with the PTE, there are several mechanisms for doing it. The available options will vary, based on your computer and its configuration.
It’s best to try the default options first. See section 34.1 for information and instructions on testing the PTE.
To launch a PTE session, you will always need to reboot your system. This will happen automatically when you click ‘Launch’. But if you choose to reboot ‘later’, the T.O.V.A. will exit but not reboot, so you can reboot your system yourself later.
Alternatively, if you are trying to boot to a T.O.V.A. flash drive on a Windows 8 or 10 computer, choose ‘Boot Options Menu’. This will take you to a special Windows menu; choose ‘Use a device’ and trigger the T.O.V.A. flash drive to boot.
If that option doesn’t work, you might choose to reboot the computer “yourself after the system shuts down". This will power down your computer instead of rebooting it, so that you can power it on and press a special key to trigger the boot device menu. Consult T.O.V.A. technical support (section 29) for more information.
The T.O.V.A. will check and update T.O.V.A. boot media when you launch a PTE test session. If directed by tech support, choose this option to bypass those functions.
These are the settings the T.O.V.A. will use to size the stimuli for the visual test, as well as simple volume adjustments for the auditory stimuli. The visual T.O.V.A. ’s stimuli are two easily discriminated geometric figures centered on the computer screen (Figure 48).
The visual T.O.V.A. was normed using stimuli under the following conditions:
These are the recommended conditions; however, monitor size, type (standard or widescreen), resolution, and distance from the subject’s eyes may vary. Target size is important for the following reasons:
Most computer configurations are well within these parameters. However, some laptops, LCD monitors, or other widescreen displays may not have the capability to “expand” the T.O.V.A. ’s smaller VGA testing screen resolution to an appropriate size. This can result in a “miniature screen” in the middle of a larger monitor, and the stimuli are subsequently very small on the screen. To address situations such as this, the T.O.V.A. software has these scale adjustment settings.
It is recommended that you closely approximate the three-inches-diagonal measurement. If the adjustments here are not sufficient to display the stimuli properly, we recommend that a different monitor be used for T.O.V.A. testing.
Stimuli for the auditory test are two easily discriminated audible tones: the target is G above middle C, and the nontarget is middle C, played though external speakers placed on either side of the display. Since the T.O.V.A. should always be administered in a quiet location, free from distraction (it is a test of attention), the volume need only be adjusted to a comfortable level.
The very first setting on this panel we will mention last. ‘Auditory calibration’ is used to adjust test timing to the slight delay (about 3.5 ms) that occurs when using USB speakers. If you are directed by technical support to use USB speakers, we will give you the appropriate value to be entered here. If you are not using USB speakers, this value should be left alone.
Here is where you can change the default settings for the T.O.V.A. multimedia test instructions (see section 36 for more information).
If you just need to change these settings temporarily for the session you’re about to give, click ‘Instructions language’ from the New Test Session window (section 20.4).
Note: Some of these settings are Admin preferences (section 27.1).
All T.O.V.A. customers are entitled to free software upgrades, and we can send you updates automatically when we fix bugs or add new features.
Note: While you may or may not elect to download T.O.V.A. updates automatically, we never install an update without asking permission.
When you install or update the T.O.V.A. software, we like to collect information about your hardware and configuration. This helps us understand how our customers use the T.O.V.A. software and provide tech support if you encounter a problem. Here, you can opt not to send this information.
Note: Some of these settings are Admin preferences (section 27.1).
Note: These settings only appear on Windows systems.
Most Windows systems that test with the PTE (section 32) use the “Automatic" method, so they don’t require a boot CD or flash drive for testing. This employs the T.O.V.A. PTE Activation service (section 38.7) to boot the PTE.
Here you can disable the T.O.V.A. service. This may cause the T.O.V.A. to regularly prompt you for permissions, so please see section 38.7.2 for more information.
The other setting available here is the T.O.V.A. PTE Activation Service port. Please don’t change this setting unless instructed by T.O.V.A. technical support! Very few people will have trouble communicating with the T.O.V.A. service on this port; if you do, it can be modified here, but it must be also modified in pte-svc.ini. See section 38.7 for more details on the T.O.V.A. PTE Activation service.
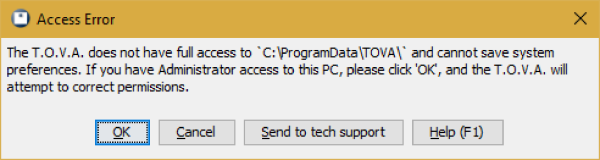 The T.O.V.A. needs full access to the shared TOVA folder
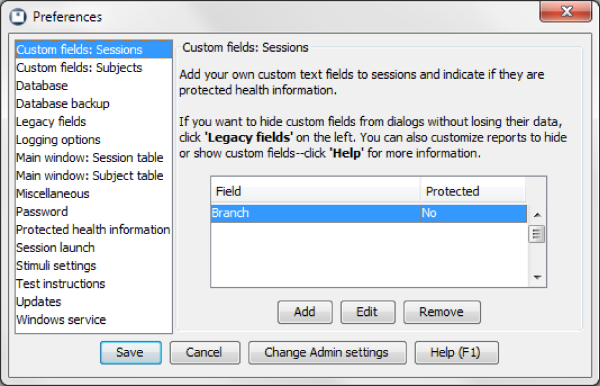 Custom Subject Fields
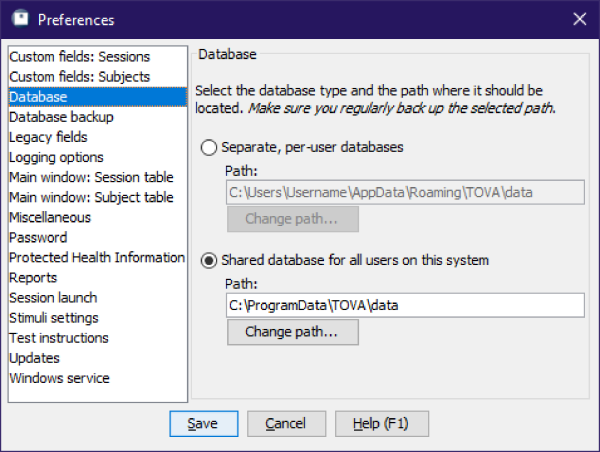 Database options
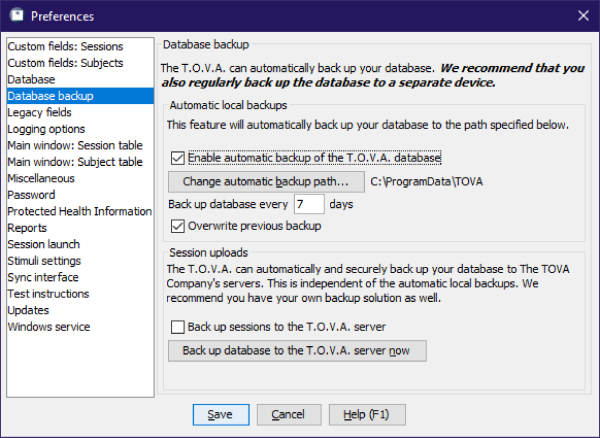 Back up your database automatically
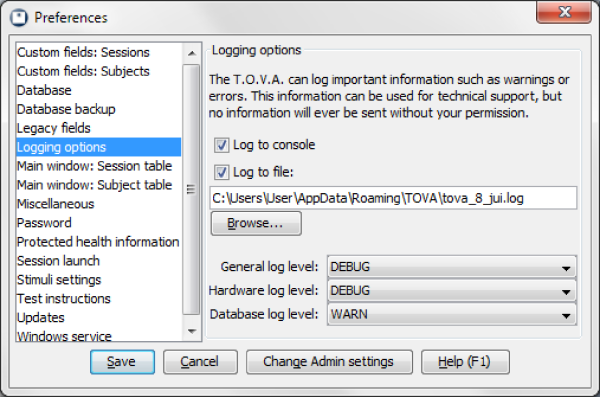 Logging options
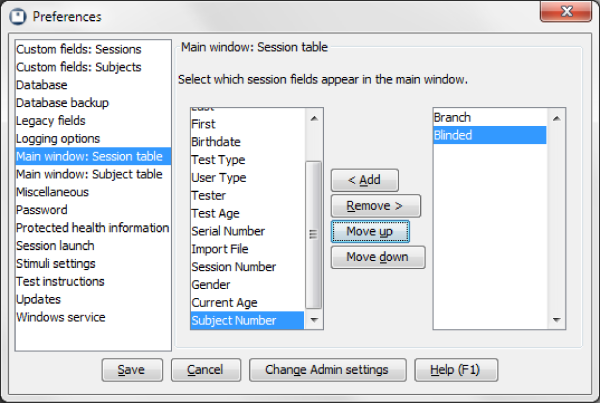 Session Table fields
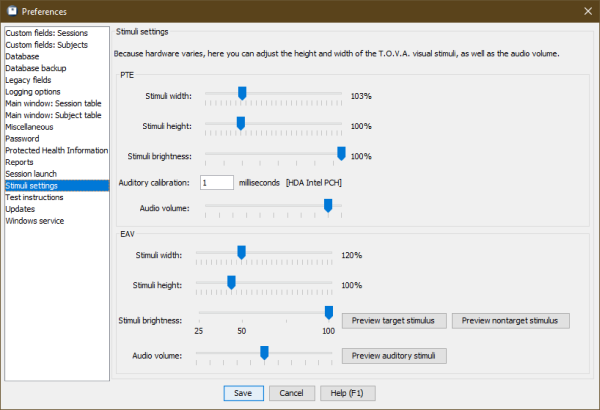 Stimuli settings
 T.O.V.A. Stimuli, Target and Nontarget
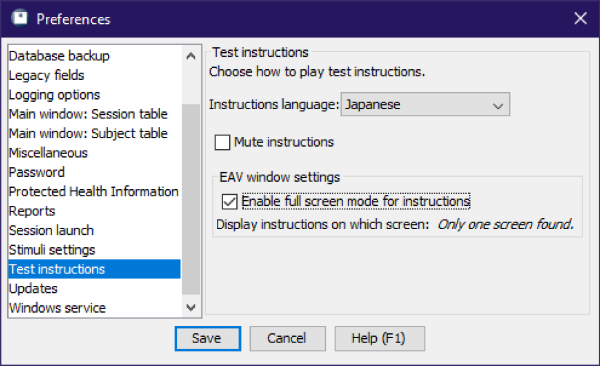 Test instruction options