


This reference section contains articles on specific features of the T.O.V.A. , discussed in more detail.
Everything starts from the main T.O.V.A. window. Some of these options may not always be available.
There’s a search field at the top of the T.O.V.A. main window. When you type a search term and press ‘Enter’, the tables update to display subjects and sessions that match your search.
How it works is best explained with an example: If you enter joe smith, the search will return the subjects and sessions that contain joe and smith. This might mean a subject named Smith whose T.O.V.A. test was administered by a tester named Joe. It will also find subjects and sessions containing a name such as Joel Nesmith, and John Smithy whose Treatments include 3 cups of Joe. It won’t, however, find records that have joe but not smith or vice verse; by default, search looks for records containing all search terms.
You can also use the OR operator. Enter joe OR smith to find all the subjects and sessions that contain either joe or smith. Note: OR must be capitalized, or it will be treated like another search term (joe or smith will look for subjects and sessions containing joe, or, and smith).
Confused yet? Play around with it–we bet you’ll figure it out!
Text searches include the following fields:
If you give a number (1234), then the term is also matched against subject number, session number, and serial number.
You can also use dates: If a term is parsable as a date (5/12/2009), the results will include subjects with that birthdate and sessions with that test date. You can also use before: and after:, to provide a range of test dates; for instance, after:9/1/2004 before:9/8/2004 will return all the tests administered September 1st through 7th, 2004. (Note: Test dates are interpreted as 12 midnight, so after:9/1/2004 includes all tests administered that day, but before:9/1/2004 would not include any.)
Finally, as with other search engines, you can search on multiple terms. If you enter john smith, for instance, you will see all of the subjects/sessions that include the word “joe" and the word “smith" anywhere in the subject or session information (including the comments, tester, custom fields, etc.) You can also enter
You can restrict a search value to a specific field using the following strings. Note: With spaces, you must use quotes around field-specific search terms, like this: "Subject Number:123".
| Field to search | Type | Labels that can be used |
| Subject number | numeric | subject number:, sub:, subject: |
| Session number | numeric | session number:, ses:, session: |
| First name | string | first name:, first: |
| Last name | string | last name:, last: |
| First and last | string | name: |
| Comments | string | comments:, com:, comm: |
| Tester name | string | tester name:, tester:, user: |
| Medications | string | medications:, med:, meds:, treatment:, treatments: |
| Serial number | string | sn:, ser:, serial:, serial#:, serial #:, serial number: |
| Import date | string | import:, import date: |
You can also search by the age of a subject when tested.
| Label | Type | Examples |
| age: | numeric | age:7 returns all sessions administered to seven year olds. |
| (Not subjects who are seven now, only seven when tested.) | ||
| younger: | decimal | younger:18, younger:5.5 |
| older: | decimal | older:12 will not return a session administered on subject’s 12th birthday, |
| but will return her session administered the next day. |
Sorting your T.O.V.A. data works just like most software. In the main window, click on any column header to sort the rows of the table by that field, in ascending order. So when you click on ‘Last’, it reorders the rows by the subjects’ last name, from ’A’ to ’Z’. Click the same column a second time, and it will sort in descending order, from ’Z’ to ’A’. Simple!
For instance, if you run the T.O.V.A. intending to retest Mary Smith, type Mary and press ‘Enter’, and you’ll only see those subjects or sessions. If that’s taking too long, add Smith and press ‘Enter’ again. Or enter gibberish (such as ujxzda) and press ‘Enter’, and it will clear the search results and stop loading altogether.
After you administer a session, you may want to add more information, such as medications administered (see Treatments, section 38.4) or comments about the session that you did not note beforehand. You can also update any custom session fields you have added to your T.O.V.A. database. From the main window, select the session and click ‘Edit’.
Note: While you can also modify the test date/time here, you should do so with caution. It will affect the calculated age of the subject and dictate the norms used to interpret the results of the test. If your system clock is incorrect, please correct it. If it does not hold the correct time, this can be a serious system problem; you may want to consider using a different system to administer the T.O.V.A. in the future.
This is where you can correct calibration values for the T.O.V.A. test. This should never be necessary if the T.O.V.A. is configured correctly, so DON’T TOUCH THIS SETTING without consulting with T.O.V.A. technical support (section 29).
You can track medications and other treatments in the T.O.V.A. . When starting a new session or editing an administered session, click ‘Add’ to add a treatment to the list. There is no limit to the number of treatments you can add to a session.
You can add three different types of treatments:
Here you can read the other manuals, test the T.O.V.A. USB device and PTE, and contact us.
This displays information about your T.O.V.A. software and hardware, useful to T.O.V.A. technical support.
If you need to contact The TOVA Company for support or service, this tells you all you need to know, such as our phone number and web address. For the best service, click one of these buttons to use our built-in Support/Service Request feature. See section 29.
You can access any of the manuals or other T.O.V.A. documentation from the Help window. If you want to learn more about the T.O.V.A. , we’ve put all the information here:
For the most part, you will not need to use the Advanced Support features here. However, if you contact T.O.V.A. technical support, they may ask you to try one of these operations to help diagnose a problem.
There are a few features that were part of the T.O.V.A. 8 that were removed from the T.O.V.A. 9 when it was cleared by the FDA as a medical device. These features have not been cleared for use in a clinical setting, but if you would like to use the T.O.V.A. in a non-clinical research setting, you can switch to “Research mode” in the T.O.V.A. Preferences (section 27.9). Test sessions administered in Research mode will be flagged as research sessions, and the T.O.V.A. report will reflect this.
Likewise, the T.O.V.A. Synchronization Interface (see the T.O.V.A. Sync Interface manual for more information) is intended for research use only and sessions administered using the device will produce research sessions. A warning will appear whenever you start a new session with the sync interface attached unless you enable Research mode in the Preferences.
When the T.O.V.A. is in Research mode, “Research Mode” will appear under the T.O.V.A. logo in the main window.
When the T.O.V.A. is in research mode, these additional features become available:
All manuals are available from your Windows Start menu, even with Research mode disabled.
For more information about these features, see the T.O.V.A. Research User’s Manual. Let us know (section 29) if there are features you would like available for clinical or research use in future versions of the T.O.V.A. .
Note: This section applies only to Windows users.
The T.O.V.A. PTE Activation service is a background service we install on Windows to perform important tasks related to booting the PTE and installing T.O.V.A. updates. Windows users with limited permissions would not normally have access to all the functions this service performs. Therefore, instead of requiring that all T.O.V.A. users have Admin rights in Windows, the T.O.V.A. service acts as a system administrator to carefully perform these operations on request. These include the following:
Click the ‘Status’ button on the main window and then ‘Service’, and you’ll see the current status of the T.O.V.A. PTE Activation service. If the service has unexpectedly stopped or failed to start, click ‘Start service’ to attempt to restart the service. (Note: This requires administrator access to your computer.)
‘View Windows services’ will launch the Windows Services console. Here you can see all of your installed Windows services, including the T.O.V.A. PTE Activation service.
If you are unable to resolve any problems, you can disable the T.O.V.A. service (see section 38.7.2 for details). Otherwise, click ‘Send to tech support...’ for more help with the problem.
Some Windows systems encounter problems with the T.O.V.A. service (conflicting security settings, for instance). For these systems, you can disable the service.
The T.O.V.A. service performs necessary operations that many Windows users don’t have access to. When you disable the service, the T.O.V.A. performs the same operations without employing the service. Since these are advanced operations, you may be prompted to “allow the following program to make changes to this computer" before and after launching a T.O.V.A. session. Granting this permission requires you to have administrator access to your system.
You can disable the service as follows:
After that, launch a T.O.V.A. session to try it out. If you are unable to grant the permissions the system needs or if the prompts become tiresome, contact T.O.V.A. tech support (section 29) for additional options.
The T.O.V.A. PTE Activation service is a background service we install on Windows to perform important tasks related to booting the PTE and installing T.O.V.A. updates.
If you see the dialog above (Figure 86), there can be several reasons:
You can start the service manually:
If you receive an error, the service won’t start, or it stops after it starts, please send a Tech Support Request to T.O.V.A. technical support (see section 29 for details). You may have software that is blocking the service, or it may not have installed properly.
Windows startup is a little funny, and sometimes the T.O.V.A. application starts up before the service. The T.O.V.A. will wait and try five times to communicate with the service, but depending on your system’s configuration, speed, age, etc., it’s possible that it might take longer. If you find that the T.O.V.A. service is already running, try restarting the T.O.V.A. to see if it still fails to communicate.
The T.O.V.A. service communicates locally on port 26001 by default. Windows Firewall, even if it blocks that port, will not block our communication because it’s local to your machine; in other words, we don’t use that port to communicate over your network or the internet. So this possibility is not likely, but we can handle this too.
If you must block that port on your system, you can change the port number we use in the T.O.V.A. Preferences (section 27.9) and in C:\Program Files (x86)\tova_9\service\tova-pte-svc.ini. Note: You must change both settings for communication to work.
Some users might not want the T.O.V.A. to reboot their system, and so we offer the option to reboot ‘later’ in the PTE launch settings. The T.O.V.A. prepares your system to boot the PTE and then exits. If, instead of rebooting your system, you run the T.O.V.A. application, you will see this window (Figure 87), giving you the option to have the T.O.V.A. reboot your system or cancel booting the PTE. The latter will clear away the prepared files, restore your normal boot settings, and start the T.O.V.A. application.
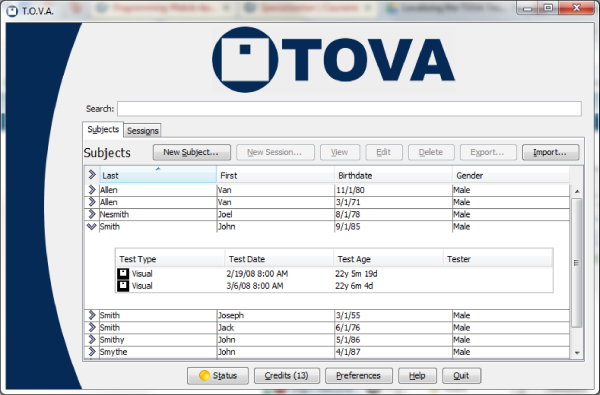 The main T.O.V.A. window
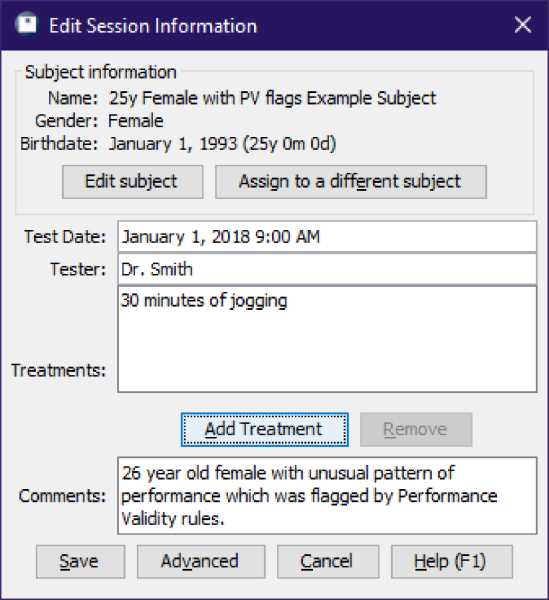 The Edit Session window
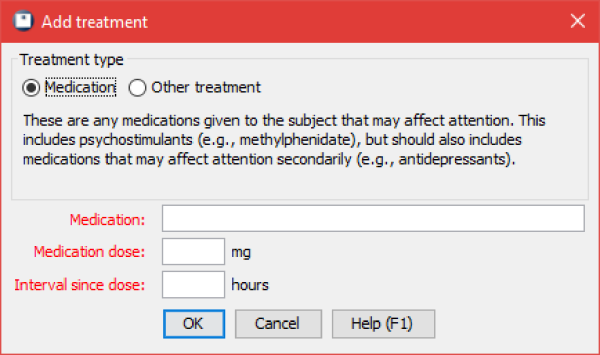 Enter the medication information
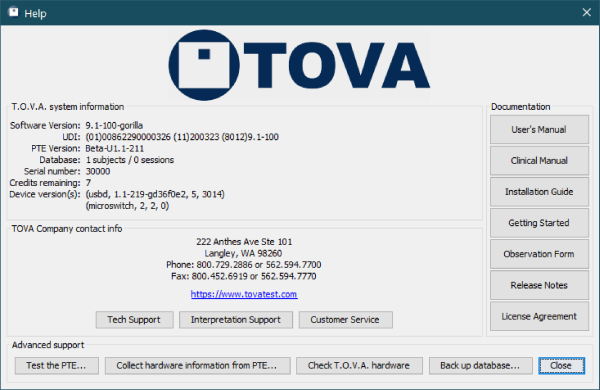 The Help Window
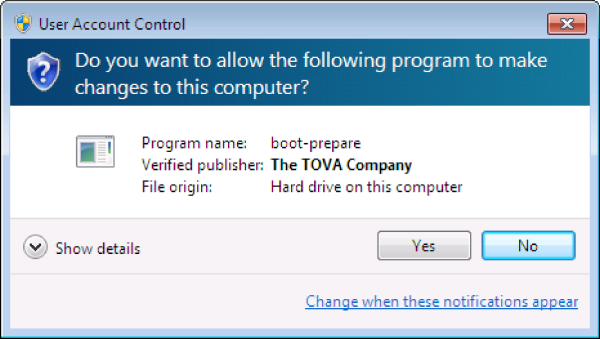 Without the service enabled, you must grant the T.O.V.A. permission to make changes
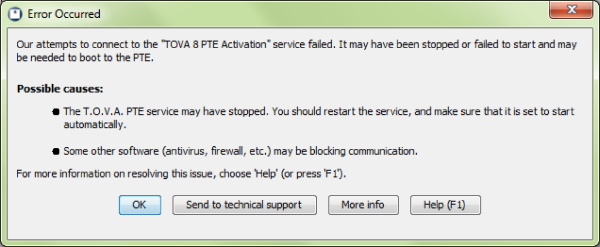 Failure to connect to the service
 Ready to boot the PTE